Friday, November 26, 2010

Java Chat


This is another find in my workspaces!

Featuring this time a simple text based chat, based on a self-developed protocol allowing server client communication.

Features
  • Simple text chat
  • Multithreaded Server
  • Singlethreaded Client
  • fully swing compatible
  • Status messages in chat window (disconnects, errors etc.)
  • Overview list with all connected clients
  • Possibility to private/ group chat
How it works

The first thing to do is to start the server. This is as easy as it sounds just clicking on the "Start" button and we can leave the server alone, handling itself all connections etc.


Next step is to initiate a Client connection to the server. This can be done by starting the Client Chat application. Here we just need to specify the server's IP Address and an appropriate nick name.


Now we can see that the main window is enabled and we can now start chatting by typing some words into the textfiled below this chat window. On the right side the chatter list appears showing only one entry, us. Let's now invitate more people to show all features!

Next persons will be Alice and Bobby:


Here we can see that "Bobby" successfully connected to the server and received a message from "Chris". Furthermore a private message was sent to him only readable of him from "Alice".

After "Bobby" connected "Alice" also joined the chat and received the message from "Chris". Then "Alice" sent a private message to "Bobby". This could be done by unchecking "Chris" from the chat overview list on the right side.


This picture shows the final result when the user "chris" disconnected after chatting with Alice and Bobby.

If you want to know more how the connection is handled then you should take a closer look at the ServerClientHandlerThread and the ClientConnectThread. The main rule plays the MessageObject which is used to determine the connected Clients and their behavior.


Download

Maven Project - with Source Code
chat.zip

Runnable Jars
Server: ChatServer.jar
Client: ChatClient.jar

J2ME Bluetooth Game Tic Tac Toe/ 3Gewinnt


Another ancient find in my workspaces!

Although today JavaFX should be the chosen platform when developing applications for limited resources devices, I once created a traditional J2ME game when JavaFX wasn't released.

The game is very simple and is equivalent to the good old known Tic Tac Toe principle. As far as I can remember I wanted to know whether it is possible to create a wireless connection between mobile devices running java.

Features

  • Single Player
  • Multiplayer via Bluetooth
  • Prepared: AI Mode
  • Fully J2ME implemented using standard GUI

The result can be seen when deploying the JAR/ JAD to your mobile handset.

I don't have pictures showing the game right now, because it is years ago since development and usage. And maybe I'm going to re-package it using Maven for simpler integration.

Successfull usage on:

Sony Ericsson K750i
Sony Ercisson T650i

and some other Nokia i can't remember anymore ;-)

Download

Project Folder - was built using WTK 2.5.2
3Gewinnt.zip

Sunday, November 14, 2010

Create Cron Job to Monitor Jetty 7


If you are new to Linux, or just forgot a lot of knowledge over years like me you might want to know how to create a Cron Job.

A Cron Job is a Task in Linux which is to be executed automatically at specific times. This can be for instance a time synchronisation script which needs to update your system time every 24 hours.

But, before we dive into cron jobs we need to define a task which should be executed.

Background

If you are working on a virtual server you are granted limited resources of the host system. That means you only have a certain amount of RAM. This leads to memory allocation problems when deploying large applications, e.g. in a webapplication server like Jetty.

Imaging now an OOM (OutOfMemory Exception) occurs at 3 o'clock in the morning, you as the system administrator will probanly be sleeping and no one can access your website due to the server's downtime. But even you were awake and notices it, you have to manually restart the server by hand. Annoying right?

Solution

In short: Check the process id of your java process connected to Jetty and if it's down restart the server.

Here is the source code of the bash script jettycheck.sh:


#! /bin/sh

jettyPid=`pgrep -f "java -jar start.jar"`
mydate=$(date +"%Y-%m-%d %k:%M:%S")

if [ "$jettyPid" == "" ]
then

echo "$mydate WARNING: Jetty is shutdown! Trying to restart it now!"
jettyHome="/opt/java/server/jetty-distribution-7.1.6.v20100715/"
#exec start of jetty server
cd $jettyHome
java -jar start.jar

fi
exit

In detail:

With pgrep we can access all process ids running on the system. I.e. we want to make sure that we only get the process id of the jetty server returned by passing the command name as parameter. We have to do this because there may be multiple 'java' processes running on the machine and we have to distinguish them.

The next is really straightforward, checking if we found a process id, if not setting our jetty home, cding to it and starting jetty.

Note: we have to switch the current working dir to jetty home, otherwise it wont find the .xml configuration files from /etc/* located in jetty home. But there is also the possibility to pass these parameters to the start.jar directly by calling 'java -jar start.jar OPTIONS=Server,jsp /etc/jetty.xml ... ', so you could start jetty from any working directory.

You can save the shell script and add execute permission with chmod 700 jettycheck.sh

Activating the Cron Job

Now that we got our script it is time to move on to the cron jobs part and let it automatically execute it. To do this we have to create a cron job:

With crontab -e we tell Linux to open an editor to edit our cron jobs according to the logged in user. Now that this may be our first cron job, a little explanation on the format:

# m h dom mon dow command
  • m = minute
  • h =hour
  • dom=day of month
  • mon=month
  • dow=day of week
  • command = the command which shoud be executed
The least time period is one minute and that is what we want. So adding this entry will ensure that our script is executed every minute, every day, every year etc:

0-59 * * * * /opt/java/server/jettycheck.sh >> /home/user/log/jettycheck.log #logs jetty errors and automatic restarts it

We also want to log the output from the script and therefore we have to create a .log file, e.g. in our users home log directory (log has to be created as well if it does not exist). If the nano editor was started to edit the crontab then we save with ctrl+o and exit with ctrl+x.

If we want to clear the log file, e.g. every 24 hours then we have to add following to the crontab:


0 0 * * * > /home/user/log/jettycheck.log #refreshes this log file every 24h


That's all you have to do to enable automatic monitoring of your jetty server! And a maximum of one minute downtime may be suitable for most personal websites.

Wednesday, October 20, 2010

JMF JVM Crashes


Recently I encountered following strange error which I got when running my VideoChat.

#
# A fatal error has been detected by the Java Runtime Environment:
#
# EXCEPTION_ACCESS_VIOLATION (0xc0000005) at pc=0x0cd32890, pid=2128, tid=1668
#
# JRE version: 6.0_17-b04
# Java VM: Java HotSpot(TM) Client VM (14.3-b01 mixed mode, sharing windows-x86 )
# Problematic frame:
# C [jmjpeg.dll+0x12890]

At first I thought this was caused by the camera driver, or a bug in the native c code.
I could track the error down to the reception part of an incoming RTP Stream.

Following code was used to display the video stream from a datasource:

Component comp;
JPanel video = new JPanel();
try {
receptionPlayer = Manager.createRealizedPlayer(clientReceptionDS);
receptionPlayer.start();

if ((comp = receptionPlayer.getVisualComponent()) != null) {

video.add(comp);
}

Everything fine, except the random crashes from the JVM.
So I started to debug the code and uncommented the video.add(cmp) and voila no crashes.

That led me to the conclusion there might be a timing problem with the player and its different states.

The solution then was to create just a Player with the incoming DataSource and add a ControllerListener who listens for state changes and tells me when the player is really realized.

Following new code was then used:

If a new stream is received we get informed via the ReceiveStreamListener which offers an Update method

public synchronized void update(ReceiveStreamEvent evt)

Inside this method we can retrive our DataSource with:

ReceiveStream stream = evt.getReceiveStream();
dataSource = stream.getDataSource();

And initialise the Player in the following way:

Player p = null;

try {
p = Manager.createPlayer(dataSource);
} catch (NoPlayerException e) {
e.printStackTrace();
} catch (IOException e) {
e.printStackTrace();
}

if (p == null)

return;

p.addControllerListener(this);

p.realize();

The ControllerListener:

public void controllerUpdate(ControllerEvent ce) {
Player p = (Player)ce.getSourceController();
if (p == null)
return;

if (ce instanceof RealizeCompleteEvent) {
vsc.startReceptionVideo(dataSource, p);
}

if (ce instanceof ControllerErrorEvent) {
p.removeControllerListener(this);
}
}

You see when there is a RealizeCompleteEvent I hand the realized Player and the DataSource over to the GUI where it will be displayed with this code:

if ((comp = receptionPlayer.getVisualComponent()) != null) {
video.add(comp);
}

receptionPlayer.start();

Result: It does not crash anymore and you have full control over the Player and its states.

Wednesday, October 13, 2010

Update: JMF Video Chat New Features


New Release of the video chat:


Added Features:
  • Fixed some bugs
  • Improved error handling
  • Added NAT Holepunch Capability (explained below)
  • Added HTTP Tunneling Capability (explained below)
It may be now possible to stream RTP video data over the internet if you either choose the method
NAT Holepunch or HTTP Tunneling.

The techniques worked in following situations:
  1. Direct connection from a host (me) to a virtual machine on the host and vice versa
  2. Software Firewalls enabled
  3. In case of NAT Holepunch, I ran the relay server on the host and used two virtual machines which communicated with each other
Short explanation of added features:

NAT Holepunch:

Participants:
  • A relay server with open udp ports
  • One computer behind a NAT
  • Another computer behind a NAT
How it works:

NAT: Network address translation
--> means ports are forwarded to the device behind it and vice versa from the device to other devices

Problem: A lot of NAT devices permit receiving UDP packets, but sending them.

That's why we can send packets to a server who can listen on all UDP ports and accept our request.

Principle:

At first the relay server is listening on a pre defined port for incoming udp packets.
Computer A tries to send a UDP packet to this server.
The packet contains information about connection details of the according peer Computer A would like to connect to later.


The relay server gets the packet and remembers the senders IP + UDP port and the packet content for later requests by Computer B.

Now Computer B sends a UDP packet to the relay server with connection details (e.g. IP) of his according peer, namely Computer A.

The relay server again gets this request and compares in his list of requests whether the new connection details from the packet match one from earlier saved requests.


If thats the case the server sends out to both peers each others connection details to the open ports earlier received of them.


Now Computer A sends UDP Packets on this open port to the direct peer on his open port and vice versa.

Now both can communicate.

HTTP Tunneling and HTTP Streaming

If you are behind a firewall your only way to communicate with the outer world is to use port 80, which is used for all http traffic (when you are browsing the internet).

In this case HTTP Tunneling comes into play.

Principle:

Short version:

We use HTTP to send the video stream to the other peer and vice versa. That means both parties have to have a listening webserver on port 80.

Long version:

Originally RTP Packets are sent via UDP as underlying protocoll. Due to the nature of firewalls blocking most traffic in general it is not possible to stream your UDP packets to another location.

The solution is to use the only free port (80). This opens another problem. In contrast to RTP HTTP works with TCP/IP as underlying protocoll. This means we have to deal with packet retransmission and therefore delays in the reception of the data.

HTTP Streaming

One solution would be to implement the common known HTTP Streaming. This works the way that you have split your stream in time equavilant segments and send these to a webserver, which serves these files.

Now the client connects to the webserver and reads one file after another.
Bad side of this method: It is not real time anymore. Due to the creation of the files the client has to wait at least the time the server needs to capture one segment and load it onto the webserver.

So what to do now?
Well, I tried to implement my own HTTP Streaming solution which roughly works like this:

  1. start capturing from the webcam
  2. while capturing read out the streaming bytes
  3. wait until a certain buffer is filled with video data
  4. now send this buffered data over http to the opponent webserver
  5. on this webserver we read out the received data and create UDP packets which are sent to the local RTP Receiver
  6. steps 1-5 on both sides

Result:
Depending on your webcam it will work!

Pictures:

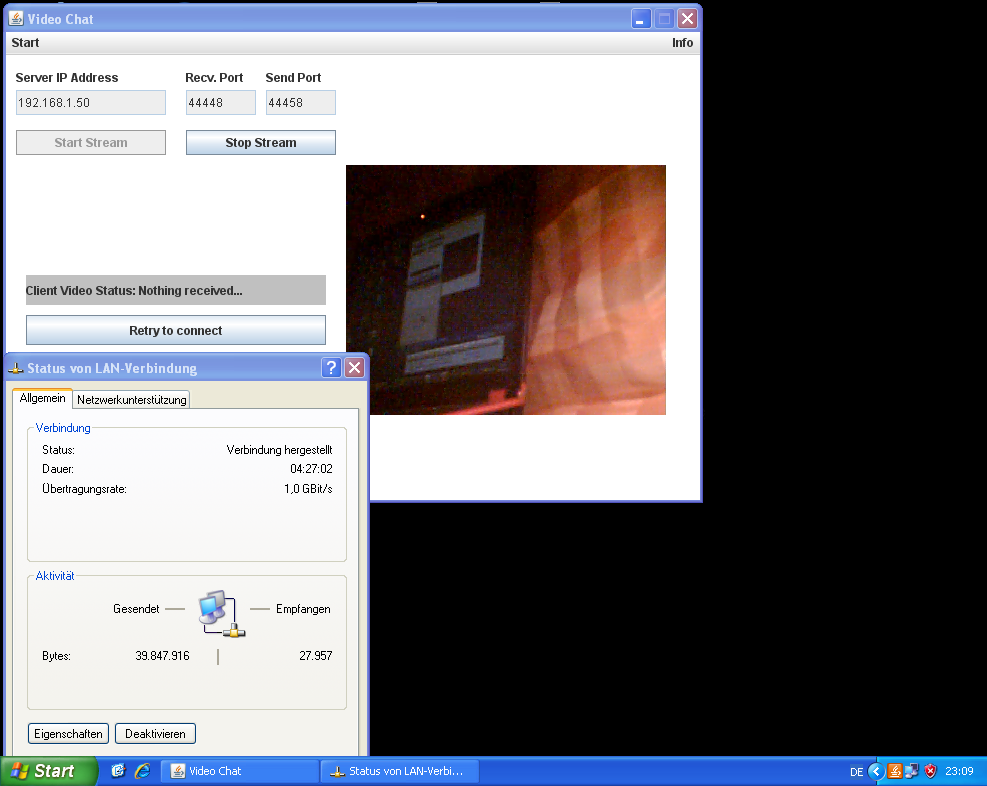
Hosting peer: Left side --> received stream over HTTP Tunneling
Right side-->webcam not working ;-)

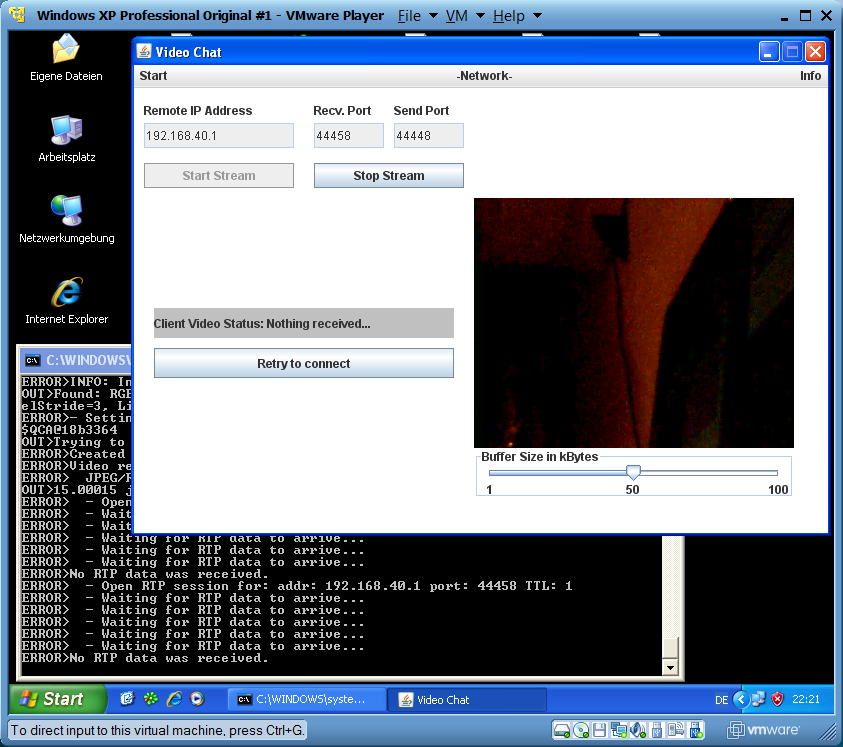
Virtual Machine Client peer: Right side: local webcam stream, left: no reception due to bad webcam of other peer


Download

VideoChat1.2.jar

Environment
JRE 1.6_U20 32 Bit

Windows XP 32 Bit
Windows 7 64 Bit

Sunday, September 26, 2010

JMF Video Chat


[UPDATE] New version available http://blog.boehme.me/2010/10/jmf-video-chat-version-11.html

I developed my own video chat using JMF as base for transmitting and receiving RTP data over a network.

At the moment the program can:

  • display all available and capable video/ audio devices
  • capture live images from your webcam
  • initiate a video chat with the same opened instance on another computer

You don't need to install the JMF as the Jar comes as full package including all dependent librarys.

Here are some pictures:


All found devices are displayed in this screen.


Local capture mode.


Network mode on the host side. Right picture is the local and left is the remote one.


Network mode on the Vm Client side. Same as above.


Test environment: Windows 7 64 Bit --> Windows Xp 32 Bit VM LAN

Requirements:

Java Runtime Environment : at least 1.6

Known Bugs:

Error: Sometimes the camera won't be detected
Solution: Try a few times to "Query Devices"

Error: Some temporary .dll files aren't deleted
Solution: Delete them by hand


Download:
Video Chat 1.0

Tuesday, September 14, 2010

JAR Wrapper for executable JAR Files


You all know .exe wrapper for jar files (like JSmooth). They are used to execute jar files and makes it more comfortable for end users to work with, because they are used to .exe files.

The problem is that you only can execute these generated files on Windows systems. For instance I started to implement a streaming video server with the Java Media Framework. Then I wanted to ship my application to another system, but the application didn't run because of dependency issues.

I had two options:
  1. Tell the user to install the JMF to execute my application
  2. To make a fully usable jar file which contains all dependencies (in this case .dll files)
I chose number 2 to be more platform independent and to free the user from installing unnecessary software.

Now the problem was that I had to build a jar which dynamically extracts and loads these librarys into the library path. Unfortunately Java does not support setting the java.library.path dynamically at runtime, that's why you have to set it when starting the JVM.

This looks something like this: java -jar -Djava.library.path= dlls/
With this argument we tell the Runtime to look into the dlls directory for some librarys we might need.
Then we can call System.load("mydependency.dll"); to make it available for access.

Summing all these issues up and having in mind not to use an .exe file I developed my own executable jar generator.

Following demands led to the decision:
  • I have a jar which has system specific dependencies
  • I need to set the java.library.path to a custom path where to find these dependencies
  • I still want to be platform independent and use a jar


So here is the final result:


The Executable Jar Name is the resulting Jar file containing the system specific jar.
The Executable Jar Location is where you want to save the generated Jar file to.
Then you can specify the including jar file. And at last in which folder the dependent librarys can be found.

If you click on generate the executable Jar File will be generated.

####################################################################
Please keep in mind that the developer of the including jar has currently to take care of the dependent library extraction and loading into the library path. This may be integrated in an upcoming version...
####################################################################

Download: JRun4J

Sunday, July 18, 2010

Old Funny Pictures


I recently browsed my old folders and guess what I found!
Old school pictures, some are showing error messages experienced by me, others are just for fun. Enjoy!


#1
The main focus get the skulls, meaning that this copy protection is nearly uncrackable :D (or was)


#2
Good old Command and Conquer Generals, well at least if you got the latest graphics card drivers.


#3
Impressive :-)


#4
This is really old school! Old Counter-Strike Bots (I think Joe Bot was it anyone remembers them?!) trying to get all at the same time through that door on cs_siege.


#5
This is how your hard drive will look like if you never did a defragmentation run in 2 years.


#6
This happened in 2003. I think some trojan or virus caused this, but really funny that i somehow activated it to output this.


#7
Don't try to plug the ethernet cable out of your PC while running Counter-Strike Condition-Zero :D


#8
Some programmers are really creative when developing error messages.


#9
Again Generals Graphics Bug a few years ago...


#10
What could there be gone wrong?


#11
This is kind of: WTF!!!


#12
NFS Underground: sometimes it really sucked!


#13
One of my favorites at that time: Original Windows XP Home

Friday, July 16, 2010

First Start


OK let's go! Time for me to start an own Blog!
Let's see what it brings :D