Showing posts with label JMF. Show all posts

Sunday, May 29, 2011

JMF Video Chat Explained - Local Webcam Access


These series should give you insight into the architecture and implementation of my video chat.
This time I will dive into the Local testing mode of the application.

Overview

  • Learn how to access a webcam locally
Lets start


This image shows you the GUI of the local menu. When clicking on "Start capture" a local video of your webcam should show up. If not you might be asked to query first for existing devices.
Another issue was that the driver has some problems in accessing your webcam. Following error may occur: javax.media.NoDataSourceException: Error instantiating class: com.sun.media.protocol.vfw.DataSource : java.io.IOException: Could not connect to capture device

In my opinion, this is a bug in the driver dll, because when clicking another time on "Start capture" the webcam will get connected properly and everything works as usual.

What is now the magic behind that GUI?

Accessing the webcam

When clicking on "Start capture" a method called "startCapture" will be called.

LocalGUI.java

private void startCapture(){

iFrame = new JInternalFrame();
iFrame.setVisible(true);
iFrame.setSize(320, 250);
iFrame.setLocation(10, 40);
iFrame.setBackground(Color.BLACK);
iFrame.setBorder(BorderFactory.createEmptyBorder());
//disable moving of internal frame
BasicInternalFrameUI ui = (BasicInternalFrameUI)iFrame.getUI();
ui.setNorthPane(null);

try {
// activate the camera
String str2 = "vfw:Microsoft WDM Image Capture (Win32):0";
MediaLocator ml = new MediaLocator(str2);
//bei onboard camera gehts erst beim 3. Mal !!! (liegt am Treiber)
//vorher
//Error instantiating class: com.sun.media.protocol.vfw.DataSource : java.io.IOException: Could not connect to capture device
DataSource original = Manager.createDataSource(ml);
iFrame.getContentPane().add(cv.connectAndCapture(original));
} catch (NoDataSourceException e) {
handleStartError(e);return;
} catch (NoPlayerException e) {
handleStartError(e);return;
} catch (CannotRealizeException e) {
handleStartError(e);return;
} catch (IOException e) {
handleStartError(e);return;
} catch (NoTrackAvailableException e) {
handleStartError(e);return;
}
main.add(iFrame);

globalProps.put("localCaptureActive", true);
globalProps.put("localCaptureMainComponents", main.getComponents());
}

How does it work? Basically we create an JInternalFrame for displaying the video later. The important steps are done between the try and catch block. At first we state that we want the VFW - video for windows driver and create a new MediaLocator. From this medialcoator we can create a new DataSource. The last step is to connect to the webcam and capture live images and add these to the JInternalFrame. Let's have a look at the CaptureVideo class that will take care of the rest.

CaptureVideo.java
     public synchronized JPanel connectAndCapture(DataSource dataSource) throws NoDataSourceException, IOException, NoTrackAvailableException, NoPlayerException, CannotRealizeException{

JPanel video = new JPanel();
video.setLayout(new BorderLayout());

// DataSource clone1 = Manager.createCloneableDataSource(dataSource);

Processor processor = Manager.createProcessor(dataSource);
boolean result = waitForState(processor, Processor.Configured);
if (result == false) {
writeToConsole("Cant configure", ConsoleLogType.WARNING, log);
}
TrackControl[] tracks = processor.getTrackControls();
// Do we have at least one track?
if (tracks == null || tracks.length < 1)
throw new NoTrackAvailableException("Did not find any track to play");
Format format = tracks[0].getFormat();
Dimension size = ((VideoFormat) format).getSize();
float frameRate = ((VideoFormat) format).getFrameRate();
writeToConsole(frameRate + " " + size, ConsoleLogType.INFO, log);

VideoFormat jpegFormat = new VideoFormat(VideoFormat.JPEG_RTP,
new Dimension(320, 240), Format.NOT_SPECIFIED,
Format.byteArray, frameRate);
//todo change resolution from received video AND local camera
// tracks[0].setFormat(jpegFormat);
//works only from device not rtp stream
// FormatControl fmtc = ((CaptureDevice)dataSource).getFormatControls()[0];
// fmtc.setFormat(jpegFormat);

System.err.println("Video received as:");
System.err.println(" " + jpegFormat);
// ContentDescriptor cd = new ContentDescriptor(
// ContentDescriptor.RAW_RTP);
// processor.setContentDescriptor(cd);

result = waitForState(processor, Controller.Realized);
if (result == false) {
writeToConsole("Cant realize", ConsoleLogType.WARNING, log);
}

DataSource dataOutput = processor.getDataOutput();
dataOutput.start();

player = Manager.createRealizedPlayer(dataSource);
processor.start();
player.start();

Component comp;
if ((comp = player.getVisualComponent()) != null) {
video.add(comp);
}
return video;
}


What does now happen in this method? As the result will be a JPanel which can be easily attached to GUI components we have to create one. The next step is to create a Processor to have control over the datasource. When the processor is realized, we can create a Player that contains the visualcomponent which can be added to the Panel.

Note: It is important to follow a certain order when starting the processor and the player, otherwise you won't get it to work together.

That's basically everything to get a webcam working.

JMF Video Chat Explained - Querying Devices


These series should give you insight into the architecture and implementation of my video chat.
This time I will dive into querying devices (Webcams, Audio Cards) with the help of JMF(Java Media Framework).

Overview

  • Learn how to query media devices in JMF
Let's start

This is the window where all the magic happens. Clicking on "Query Devices" will start querying all available media devices. The question is what steps are required to perform this task?

Let's have a look at the source code:

DevicesGUI.java

     private class StartQueryingDevices implements ActionListener{

private DevicesGUI devicesGUI;

public StartQueryingDevices(DevicesGUI devicesGUI){
this.devicesGUI = devicesGUI;
}

public void actionPerformed(ActionEvent e) {
queryDevicesButton.setEnabled(false);
QueryDevicesThread qdt = new QueryDevicesThread();
qdt.addDeviceStatusListener(devicesGUI);
Thread t = new Thread(qdt);
t.start();
}

}


This inner class handles the click on the "Query Devices" Button. When clicked we create a new "QueryDevicesThread" and activate the Listener Pattern, so we get informed when the querying of devices has ended. Finally we start the thread. Let's look into the Thread.

QueryDevicesThread.java

package de.boehme.app.videochat.thread;

import java.util.logging.Logger;

import de.boehme.app.videochat.exception.ConsoleLogType;
import de.boehme.app.videochat.server.IDeviceQueryListener;

public class QueryDevicesThread implements Runnable {

private Logger log = Logger.getLogger(this.getClass().getName());

private IDeviceQueryListener deviceListener;

public void run() {

queryDevices();
deviceListener.ready();
}

private synchronized void queryDevices(){
//darf erst anfangen wenn alle anderen fertig sind
Class<?> directAudio = null;
Class<?> autoAudio = null;
Class<?> autoVideo = null;
Class<?> autoVideoPlus = null;
@SuppressWarnings("unused")
Object instanceAudio;
@SuppressWarnings("unused")
Object instanceVideo;
@SuppressWarnings("unused")
Object instanceVideoPlus;

// video... Windows
try {
autoVideo = Class.forName("VFWAuto");
} catch (Exception e) {
deviceListener.writeToConsole("No VFWAuto", ConsoleLogType.WARNING, log);
}

if (autoVideo == null) {
try {
autoVideo = Class.forName("SunVideoAuto");
} catch (Exception ee) {
deviceListener.writeToConsole("No SunVideoAuto", ConsoleLogType.WARNING, log);
}
try {
autoVideoPlus = Class.forName("SunVideoPlusAuto");
} catch (Exception ee) {
deviceListener.writeToConsole("No SunVideoPlusAuto", ConsoleLogType.WARNING, log);
}
}
// Linux??
if (autoVideo == null) {
try {
autoVideo = Class.forName("V4LAuto");
} catch (Exception eee) {
deviceListener.writeToConsole("No V4LAuto", ConsoleLogType.WARNING, log);
}
}

if (autoVideo != null)
try {
instanceVideo = autoVideo.newInstance();
} catch (InstantiationException e1) {
e1.printStackTrace();
} catch (IllegalAccessException e1) {
e1.printStackTrace();
}
if (autoVideoPlus != null)
try {
instanceVideoPlus = autoVideoPlus.newInstance();
} catch (InstantiationException e1) {
e1.printStackTrace();
} catch (IllegalAccessException e1) {
e1.printStackTrace();
}

// audio...

try {
directAudio = Class.forName("DirectSoundAuto");
} catch (Exception e) {
deviceListener.writeToConsole("No DirectSoundAuto", ConsoleLogType.WARNING, log);
}

try {
autoAudio = Class.forName("JavaSoundAuto");
} catch (Exception e) {
deviceListener.writeToConsole("No JavaSoundAuto", ConsoleLogType.WARNING, log);
}

if (directAudio != null)
try {
instanceAudio = directAudio.newInstance();
} catch (InstantiationException e) {
e.printStackTrace();
} catch (IllegalAccessException e) {
e.printStackTrace();
}
if (autoAudio != null)
try {
instanceAudio = autoAudio.newInstance();
} catch (InstantiationException e) {
e.printStackTrace();
} catch (IllegalAccessException e) {
e.printStackTrace();
}
}

public void addDeviceStatusListener(IDeviceQueryListener deviceListener){
this.deviceListener = deviceListener;
}
}


Whats happening here? Well, when the thread is started the method "queryDevices" will be called. Note: The Method is "synchronized" because the querying of devices will take place at a different spot, namely the .dlls will do the whole work for us. Thats why we dont have any control over the process, except to choose which type of devices should get queried. This can be seen when looking at autoVideo = Class.forName("VFWAuto");. Here we will look for the Video for windows driver and call him. The same operation will happen later for different operating systems like Linux.

As the querying is finished, we call .ready() method to return to the GUI class and display the resulting devices list.

That's all.

Wednesday, October 20, 2010

JMF JVM Crashes


Recently I encountered following strange error which I got when running my VideoChat.

#
# A fatal error has been detected by the Java Runtime Environment:
#
# EXCEPTION_ACCESS_VIOLATION (0xc0000005) at pc=0x0cd32890, pid=2128, tid=1668
#
# JRE version: 6.0_17-b04
# Java VM: Java HotSpot(TM) Client VM (14.3-b01 mixed mode, sharing windows-x86 )
# Problematic frame:
# C [jmjpeg.dll+0x12890]

At first I thought this was caused by the camera driver, or a bug in the native c code.
I could track the error down to the reception part of an incoming RTP Stream.

Following code was used to display the video stream from a datasource:

Component comp;
JPanel video = new JPanel();
try {
receptionPlayer = Manager.createRealizedPlayer(clientReceptionDS);
receptionPlayer.start();

if ((comp = receptionPlayer.getVisualComponent()) != null) {

video.add(comp);
}

Everything fine, except the random crashes from the JVM.
So I started to debug the code and uncommented the video.add(cmp) and voila no crashes.

That led me to the conclusion there might be a timing problem with the player and its different states.

The solution then was to create just a Player with the incoming DataSource and add a ControllerListener who listens for state changes and tells me when the player is really realized.

Following new code was then used:

If a new stream is received we get informed via the ReceiveStreamListener which offers an Update method

public synchronized void update(ReceiveStreamEvent evt)

Inside this method we can retrive our DataSource with:

ReceiveStream stream = evt.getReceiveStream();
dataSource = stream.getDataSource();

And initialise the Player in the following way:

Player p = null;

try {
p = Manager.createPlayer(dataSource);
} catch (NoPlayerException e) {
e.printStackTrace();
} catch (IOException e) {
e.printStackTrace();
}

if (p == null)

return;

p.addControllerListener(this);

p.realize();

The ControllerListener:

public void controllerUpdate(ControllerEvent ce) {
Player p = (Player)ce.getSourceController();
if (p == null)
return;

if (ce instanceof RealizeCompleteEvent) {
vsc.startReceptionVideo(dataSource, p);
}

if (ce instanceof ControllerErrorEvent) {
p.removeControllerListener(this);
}
}

You see when there is a RealizeCompleteEvent I hand the realized Player and the DataSource over to the GUI where it will be displayed with this code:

if ((comp = receptionPlayer.getVisualComponent()) != null) {
video.add(comp);
}

receptionPlayer.start();

Result: It does not crash anymore and you have full control over the Player and its states.

Wednesday, October 13, 2010

Update: JMF Video Chat New Features


New Release of the video chat:


Added Features:
  • Fixed some bugs
  • Improved error handling
  • Added NAT Holepunch Capability (explained below)
  • Added HTTP Tunneling Capability (explained below)
It may be now possible to stream RTP video data over the internet if you either choose the method
NAT Holepunch or HTTP Tunneling.

The techniques worked in following situations:
  1. Direct connection from a host (me) to a virtual machine on the host and vice versa
  2. Software Firewalls enabled
  3. In case of NAT Holepunch, I ran the relay server on the host and used two virtual machines which communicated with each other
Short explanation of added features:

NAT Holepunch:

Participants:
  • A relay server with open udp ports
  • One computer behind a NAT
  • Another computer behind a NAT
How it works:

NAT: Network address translation
--> means ports are forwarded to the device behind it and vice versa from the device to other devices

Problem: A lot of NAT devices permit receiving UDP packets, but sending them.

That's why we can send packets to a server who can listen on all UDP ports and accept our request.

Principle:

At first the relay server is listening on a pre defined port for incoming udp packets.
Computer A tries to send a UDP packet to this server.
The packet contains information about connection details of the according peer Computer A would like to connect to later.


The relay server gets the packet and remembers the senders IP + UDP port and the packet content for later requests by Computer B.

Now Computer B sends a UDP packet to the relay server with connection details (e.g. IP) of his according peer, namely Computer A.

The relay server again gets this request and compares in his list of requests whether the new connection details from the packet match one from earlier saved requests.


If thats the case the server sends out to both peers each others connection details to the open ports earlier received of them.


Now Computer A sends UDP Packets on this open port to the direct peer on his open port and vice versa.

Now both can communicate.

HTTP Tunneling and HTTP Streaming

If you are behind a firewall your only way to communicate with the outer world is to use port 80, which is used for all http traffic (when you are browsing the internet).

In this case HTTP Tunneling comes into play.

Principle:

Short version:

We use HTTP to send the video stream to the other peer and vice versa. That means both parties have to have a listening webserver on port 80.

Long version:

Originally RTP Packets are sent via UDP as underlying protocoll. Due to the nature of firewalls blocking most traffic in general it is not possible to stream your UDP packets to another location.

The solution is to use the only free port (80). This opens another problem. In contrast to RTP HTTP works with TCP/IP as underlying protocoll. This means we have to deal with packet retransmission and therefore delays in the reception of the data.

HTTP Streaming

One solution would be to implement the common known HTTP Streaming. This works the way that you have split your stream in time equavilant segments and send these to a webserver, which serves these files.

Now the client connects to the webserver and reads one file after another.
Bad side of this method: It is not real time anymore. Due to the creation of the files the client has to wait at least the time the server needs to capture one segment and load it onto the webserver.

So what to do now?
Well, I tried to implement my own HTTP Streaming solution which roughly works like this:

  1. start capturing from the webcam
  2. while capturing read out the streaming bytes
  3. wait until a certain buffer is filled with video data
  4. now send this buffered data over http to the opponent webserver
  5. on this webserver we read out the received data and create UDP packets which are sent to the local RTP Receiver
  6. steps 1-5 on both sides

Result:
Depending on your webcam it will work!

Pictures:

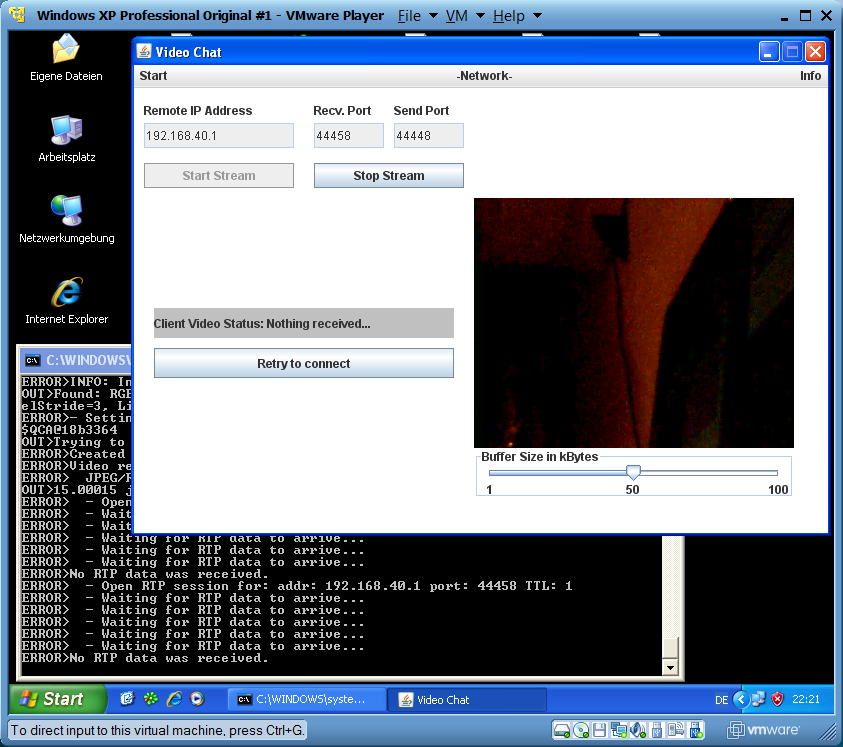
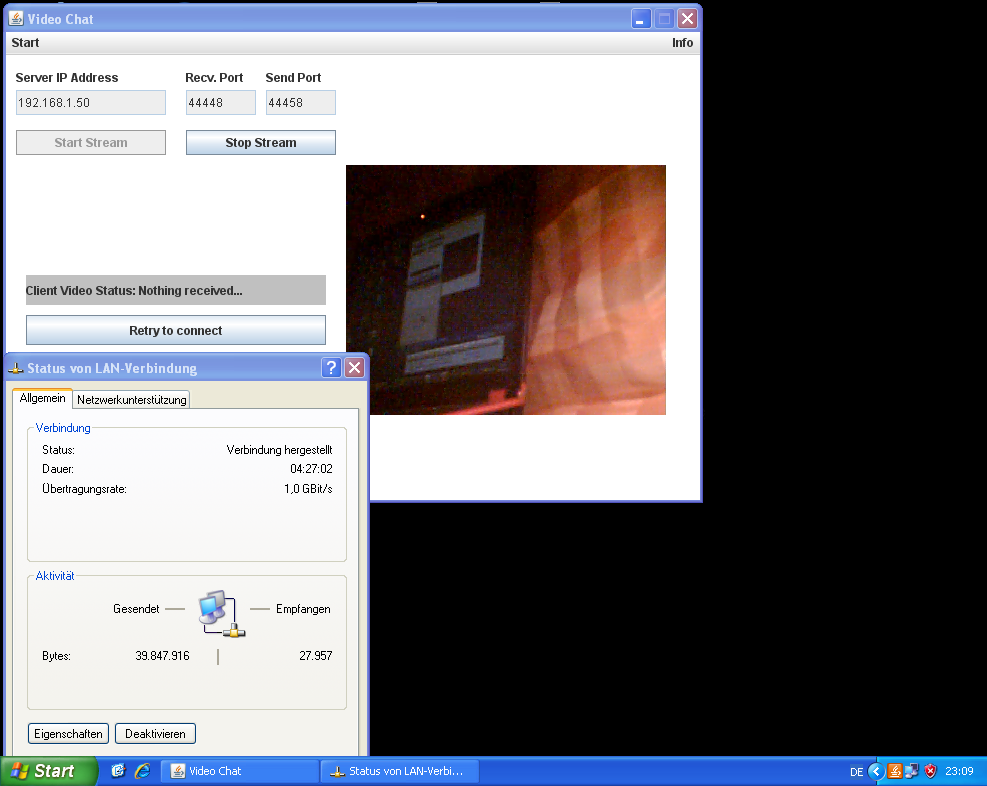
Hosting peer: Left side --> received stream over HTTP Tunneling
Right side-->webcam not working ;-)

Virtual Machine Client peer: Right side: local webcam stream, left: no reception due to bad webcam of other peer


Download

VideoChat1.2.jar

Environment
JRE 1.6_U20 32 Bit

Windows XP 32 Bit
Windows 7 64 Bit

Sunday, September 26, 2010

JMF Video Chat


[UPDATE] New version available http://blog.boehme.me/2010/10/jmf-video-chat-version-11.html

I developed my own video chat using JMF as base for transmitting and receiving RTP data over a network.

At the moment the program can:

  • display all available and capable video/ audio devices
  • capture live images from your webcam
  • initiate a video chat with the same opened instance on another computer

You don't need to install the JMF as the Jar comes as full package including all dependent librarys.

Here are some pictures:


All found devices are displayed in this screen.


Local capture mode.


Network mode on the host side. Right picture is the local and left is the remote one.


Network mode on the Vm Client side. Same as above.


Test environment: Windows 7 64 Bit --> Windows Xp 32 Bit VM LAN

Requirements:

Java Runtime Environment : at least 1.6

Known Bugs:

Error: Sometimes the camera won't be detected
Solution: Try a few times to "Query Devices"

Error: Some temporary .dll files aren't deleted
Solution: Delete them by hand


Download:
Video Chat 1.0