New Release of the video chat:Added Features:- Fixed some bugs
- Improved error handling
- Added NAT Holepunch Capability (explained below)
- Added HTTP Tunneling Capability (explained below)
It may be now possible to stream RTP video data over the internet if you either choose the method
NAT Holepunch or HTTP Tunneling.
The techniques worked in following situations:
- Direct connection from a host (me) to a virtual machine on the host and vice versa
- Software Firewalls enabled
- In case of NAT Holepunch, I ran the relay server on the host and used two virtual machines which communicated with each other
Short explanation of added features:
NAT Holepunch:Participants:
- A relay server with open udp ports
- One computer behind a NAT
- Another computer behind a NAT
How it works:NAT: Network address translation
--> means ports are forwarded to the device behind it and vice versa from the device to other devices
Problem: A lot of NAT devices permit receiving UDP packets, but sending them.
That's why we can send packets to a server who can listen on all UDP ports and accept our request.
Principle:At first the relay server is listening on a pre defined port for incoming udp packets.
Computer A tries to send a UDP packet to this server.
The packet contains information about connection details of the according peer Computer A would like to connect to later.

The relay server gets the packet and remembers the senders IP + UDP port and the packet content for later requests by Computer B.
Now Computer B sends a UDP packet to the relay server with connection details (e.g. IP) of his according peer, namely Computer A.
The relay server again gets this request and compares in his list of requests whether the new connection details from the packet match one from earlier saved requests.

If thats the case the server sends out to both peers each others connection details to the open ports earlier received of them.

Now Computer A sends UDP Packets on this open port to the direct peer on his open port and vice versa.
Now both can communicate.
HTTP Tunneling and HTTP StreamingIf you are behind a firewall your only way to communicate with the outer world is to use port 80, which is used for all http traffic (when you are browsing the internet).
In this case HTTP Tunneling comes into play.
Principle:
Short version: We use HTTP to send the video stream to the other peer and vice versa. That means both parties have to have a listening webserver on port 80.
Long version:Originally RTP Packets are sent via UDP as underlying protocoll. Due to the nature of firewalls blocking most traffic in general it is not possible to stream your UDP packets to another location.
The solution is to use the only free port (80). This opens another problem. In contrast to RTP HTTP works with TCP/IP as underlying protocoll. This means we have to deal with packet retransmission and therefore delays in the reception of the data.
HTTP StreamingOne solution would be to implement the common known HTTP Streaming. This works the way that you have split your stream in time equavilant segments and send these to a webserver, which serves these files.
Now the client connects to the webserver and reads one file after another.
Bad side of this method: It is not real time anymore. Due to the creation of the files the client has to wait at least the time the server needs to capture one segment and load it onto the webserver.
So what to do now?
Well, I tried to implement my own HTTP Streaming solution which roughly works like this:
- start capturing from the webcam
- while capturing read out the streaming bytes
- wait until a certain buffer is filled with video data
- now send this buffered data over http to the opponent webserver
- on this webserver we read out the received data and create UDP packets which are sent to the local RTP Receiver
- steps 1-5 on both sides
Result: Depending on your webcam it will work!
Pictures:

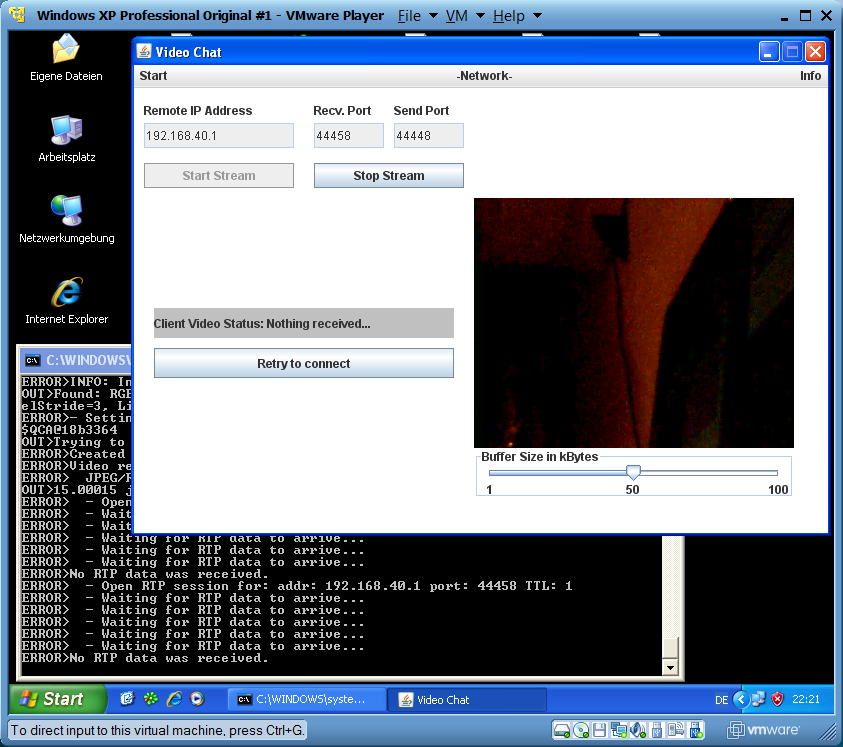
Hosting peer: Left side --> received stream over HTTP Tunneling
Right side-->webcam not working ;-)
Virtual Machine Client peer: Right side: local webcam stream, left: no reception due to bad webcam of other peer
DownloadVideoChat1.2.jarEnvironmentJRE 1.6_U20 32 Bit
Windows XP 32 Bit
Windows 7 64 Bit


 After "Bobby" connected "Alice" also joined the chat and received the message from "Chris". Then "Alice" sent a private message to "Bobby". This could be done by unchecking "Chris" from the chat overview list on the right side.
 This picture shows the final result when the user "chris" disconnected after chatting with Alice and Bobby.